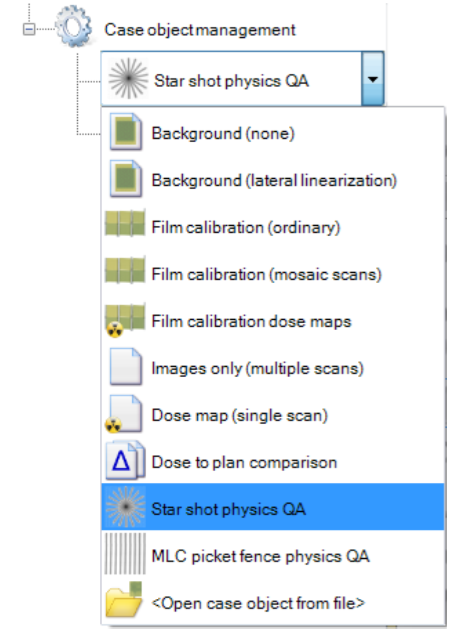
Add a ‘Star shot physics QA’ object to your case.
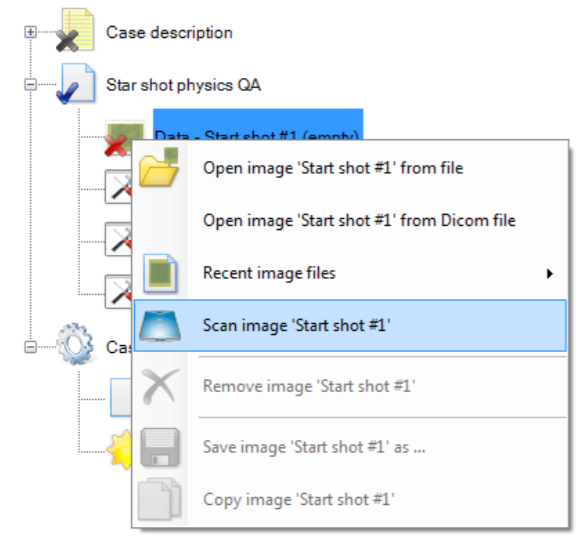
Acquire the Start Shot image - either read it from file or scan it directly.
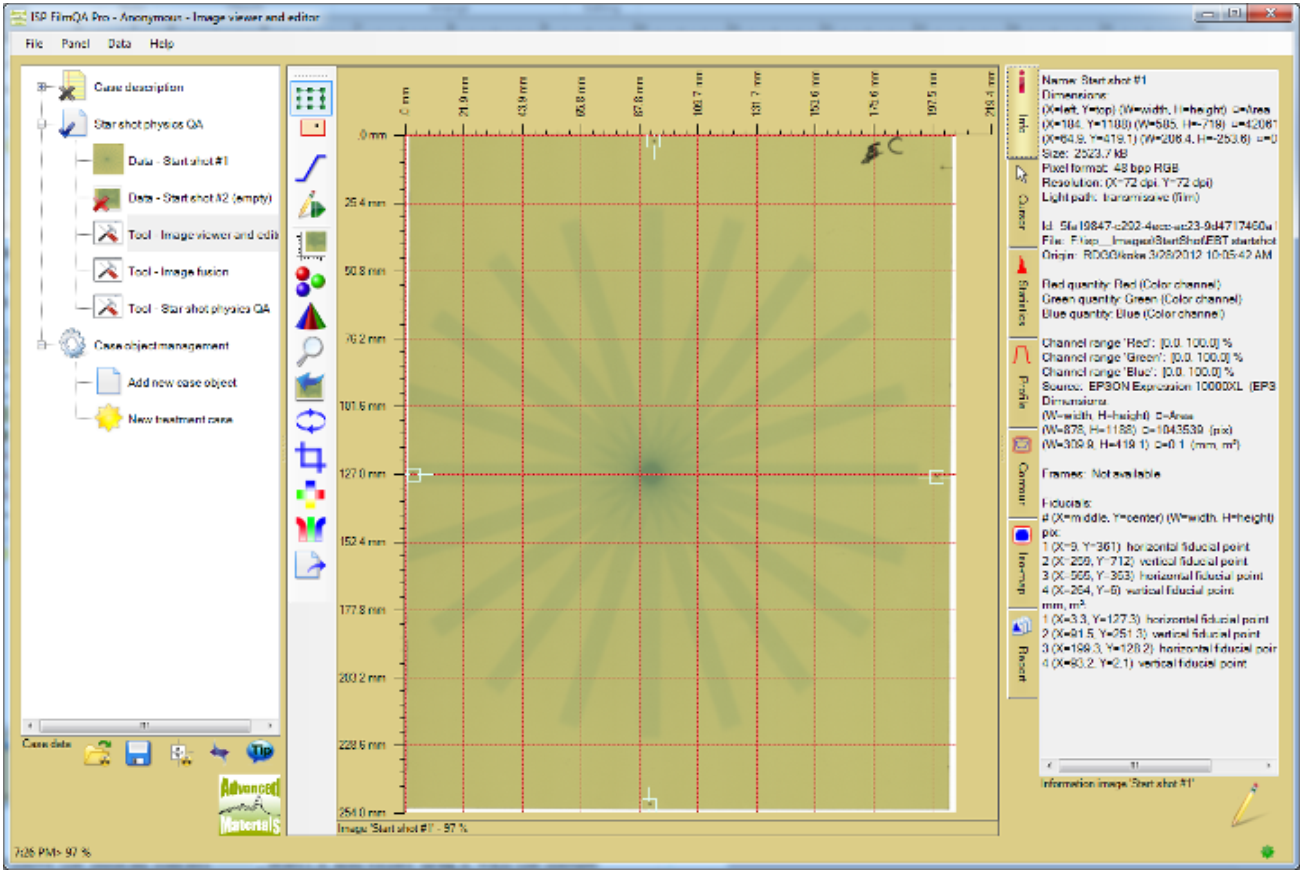
For automated image Registration select the fiducial tool  and mark the fiducial positions at the star shot image as shown below. Any number of fiducials can be used to identify the isocenter. However, the minimum number to determine both x, y shift and rotation is 3 fiducials.
Tip: To move the fiducial marker  , select it and either drag it with the mouse pointer or use Ctrl+Arrow keys. To delete a fiducial marker, select it and press Del key.
To change the fiducial type, open the fiducial tool and select the wanted type.
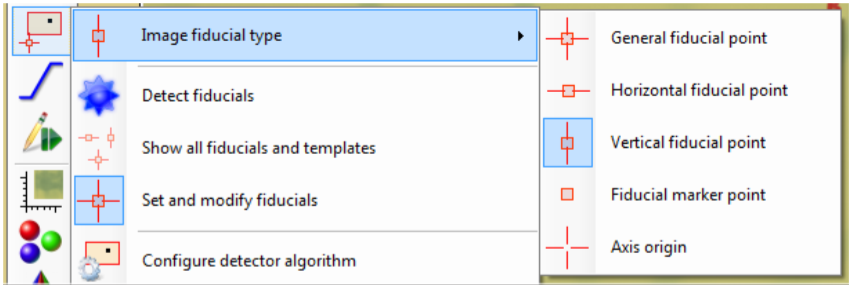
General fiducials are used to fit both a and y axis of the isocenter. Horizontal fiducials fit only the y coordinate.
When all fiducials are marked, select the tool “Star shot physics QA” in the case tree.
The isocenter is automatically fitted to the marked fiducials as shown below.
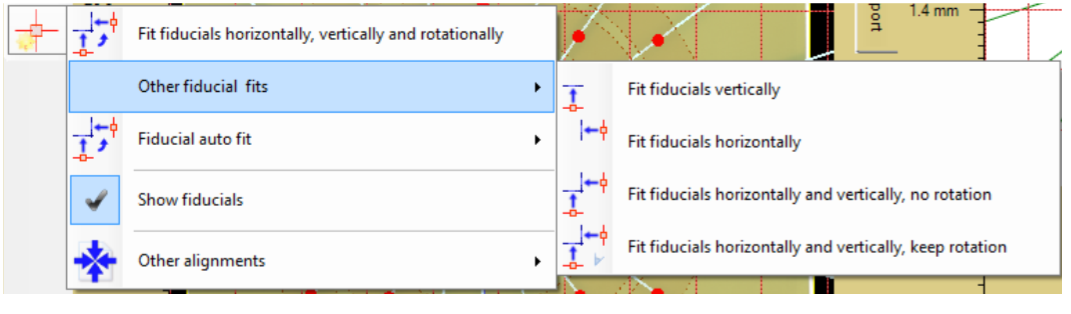
Tip: Isocenter can fitted with other options using the fiducial fitter tool  and selecting the wanted type of fit (see below).
The star shot analysis tools automatically detects the beam lines and displays the intersection points between the beams and the analysis path circles as shown below in the center section.
The analysis tab at the right shows a magnification of the beam intersection area and the smallest circle including all beam intersection (see section below for more details).
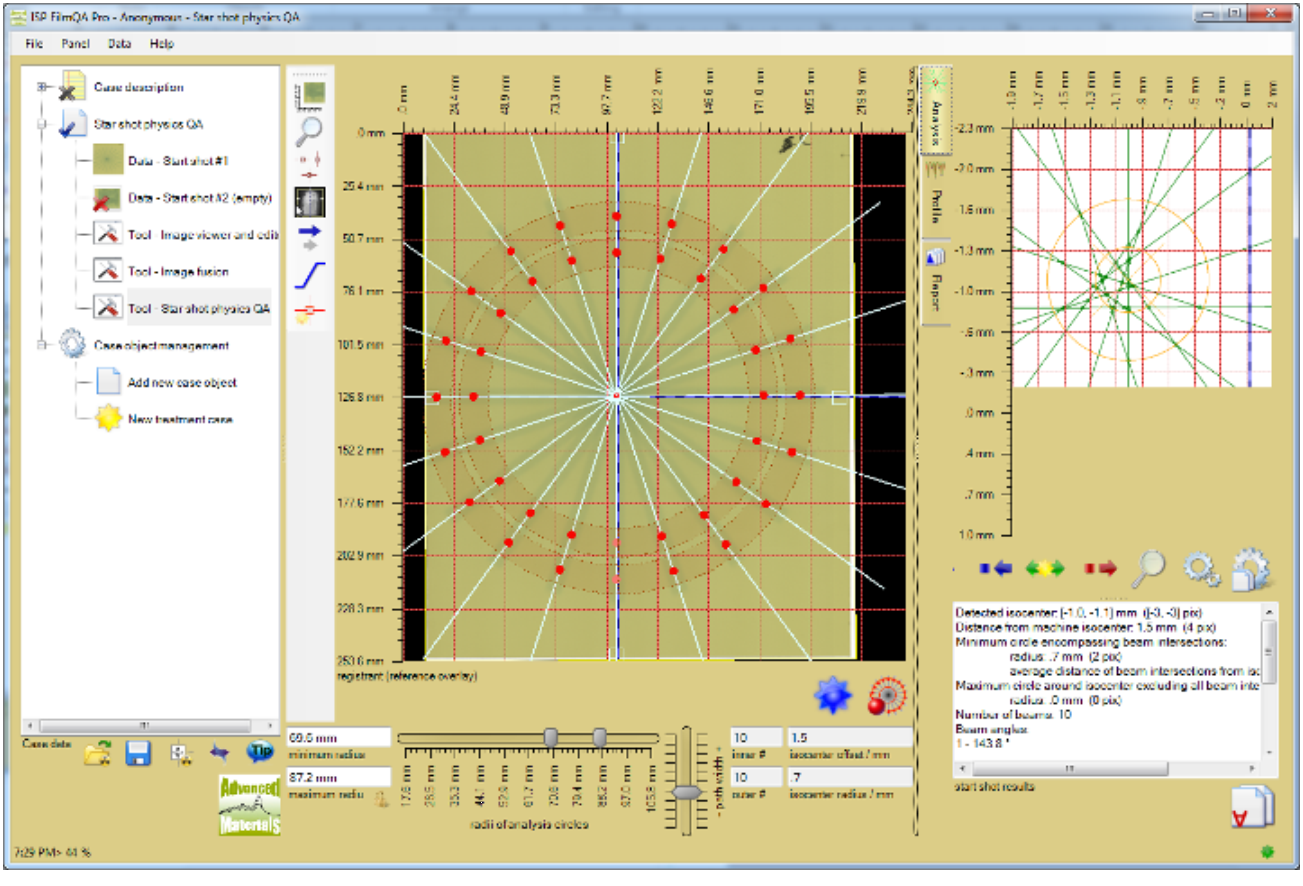
The detected results depend on the radii of the chosen analysis path circles. Each circle has a range used to average the pixel data.
The analysis circles including the averaging range must be fully covered by the beams.
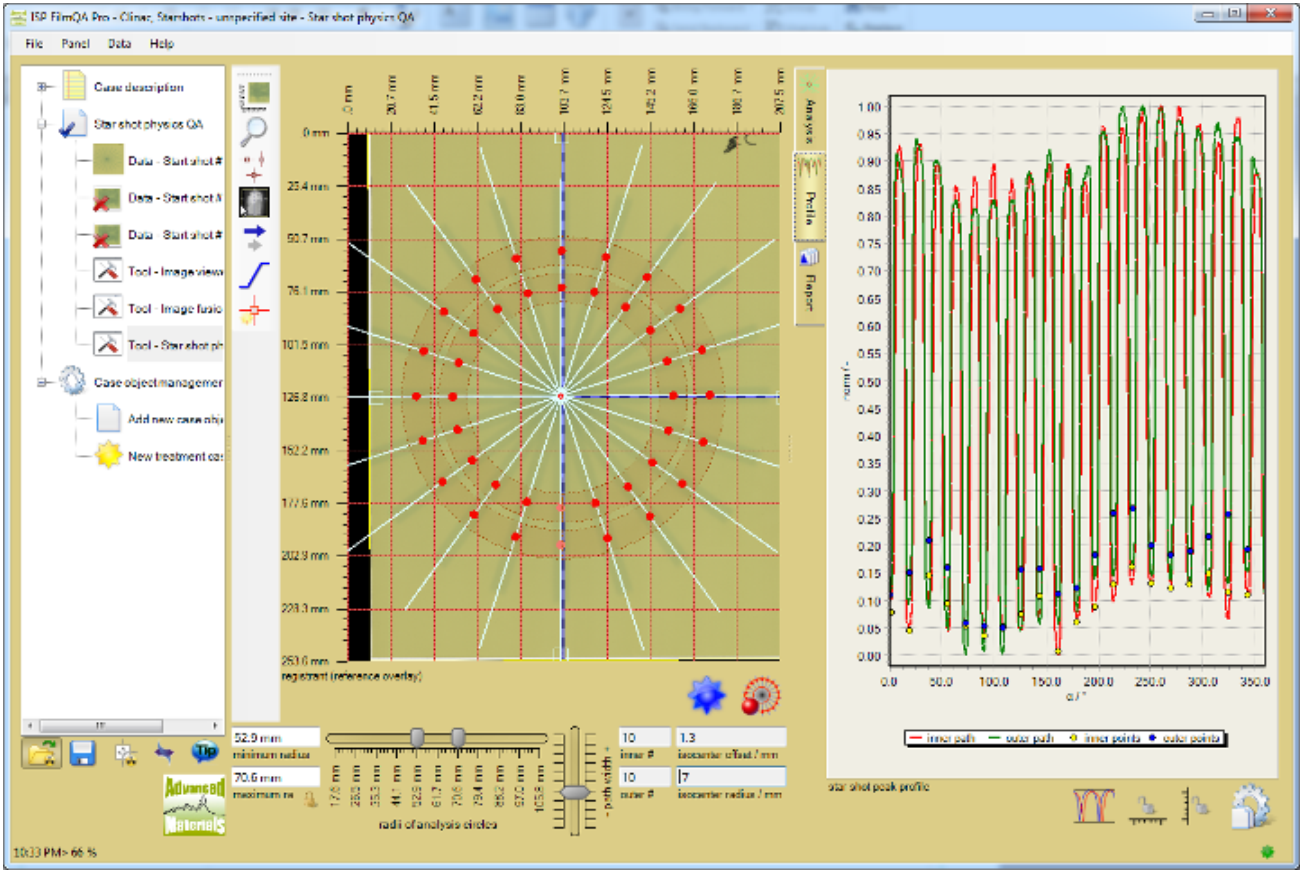
To verify the quality of the detected beam points select the Profile tab at the right. This will display the profile data along the analysis circles and the detected minima points (center of the beam lines).
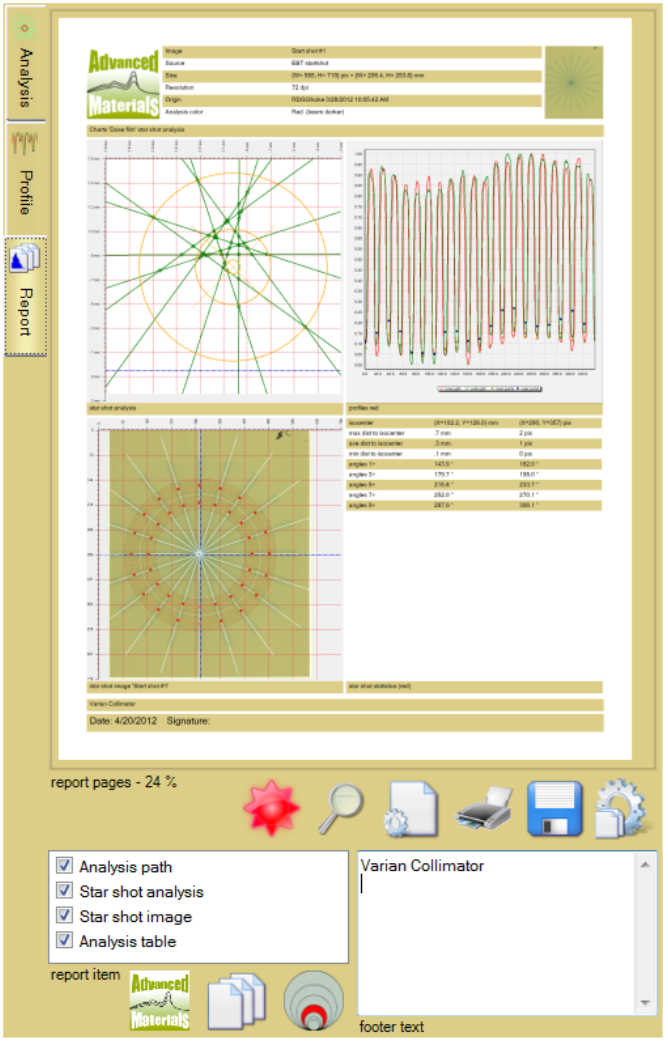
When the analysis is completed, select the report tab to summarize the results for the records.
Enable the items that should be included in the report and add the information to identify the test in the ‘footer text’ box.