Status Bar

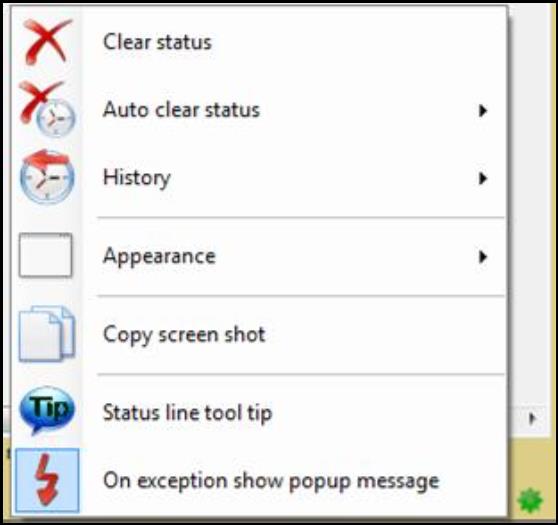
The Status Bar is located at the bottom of the screen. It allows you to view the current status, to make changes to the status history, to change the appearance of the screen, and to copy a screen shot.

Right click on the “Status Bar” and

  • Select “Clear status” to clear the status displayed on the “Status Bar.”
  • Select “Auto clear status” to set the elapsed time before the information displayed in the “Status Bar” is erased.
  • Select “History” to view the status history.
    • Select “Exceptions” to show the “Exception history” window. This allows you to view the history of software exceptions which are events where the application cannot complete a user-requested task. They are a tool to aid in identifying and fixing software bugs.
      • Right click inside the “Exception history” window and
        • à Select “Exception level depth” to change the level of exception showing in the “Exception history” window. For example, “Exception 1” in the image below has three exception levels.
        • à Select “History length” to select the number of exception data allowed to view in the “Exception history” window.
        • à Select “Reset history” to clear all the exception data in the window.
        • à Select “Word wrap” to wrap the words to fit the window width.
      • The “Filter” panel allows you to enter a filter string to reduce the number of visible exceptions in the window. See detailed descriptions and examples in “Menu.”
    • Select “Status” to view the “Status history” window showing the complete status history since the application was opened.
      • Right click in the “Status history” window to clear the status history, copy all the status, or copy the selected row.
  • Select “Appearance” to change the appearance of the screen. See details in “Padding” panel section.
  • Select “Copy screen shot” to copy an image of the current screen.
  • Select “Status line tool tip” to see an overview of status history when moving the cursor to the “Status Bar.”
  • Check or uncheck “On exception show popup message” to turn on or off the popup windows generated when exceptions occur. The “Task” button locates on the lower right corner of the screen. It appears as when there is no task calculating and appears as 
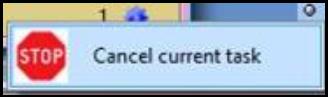
when calculations are being performed. The number on the left indicates the number of tasks being calculated. Right click on the button and select “Cancel current task” to cancel the task that’s being calculated.